UPGRADING NETWORKER CLIENT ON WINDOWS AND LINUX PLATFORM USING ANSIBLE
Ansible is one of the most popular tools today in the Infrastructure Automation space. It is an IT orchestration engine that can be used for configuration management, orchestration, provisioning, and deployment. I really can’t compare ansible with other similar tools in the market today, because I haven’t used the other tools yet.
In this article we will be looking at how to install or upgrade NetWorker on Linux/Windows using. We are going to create ansible playbooks for the tasks that are at hand. Let’s start simple and then create a little more complicated playbook with loops and conditional statements. I am a newbie to Ansible, so if any of the visitors have any suggestion or can improve on the playbook that I have please contribute in the comment section below, so that it can help others coming here to see how to achieve this task. I will create a page for this on my website and link it in the description as well. So, let’s get started.
First of all, why would we want to install the agent using ansible can't we just ask the OS admin to get this done and Yes, we have NetWorker tools like nsrpush to do an upgrade as well. Well with the adoption of DevOps in the different fields in IT, there is more and more expectations from the engineers to automate all the tasks that would rather be done manually. So, when your company wants to move into a model of automating the general tasks using automation tools like Ansible you can be ready with solutions. Let's get into what you are really here for – Installing, Upgrading and Uninstalling NetWorker using Ansible.
Please do keep in mind that this is not an ansible tutorial and there are many tutorials and ebooks out there that can help you understand how ansible works and how to structure an ansible playbook, I recommend you to refer to them if you want to understand Ansible more in depth. But I will take you through the structure of the playbook that I will be using and about each task that is used in the playbook. The tasks are called modules and are well documented in https://docs.ansible.com/ansible/latest/user_guide/windows_setup.html
Inventory file
Before going into the playbook let’s look at the inventory file. There is a default inventory file that is defined in Ansible config and is usually at the location /etc/ansible/hosts. We will be using a user defined inventory file where all the information that we need is present. An inventory describes the parameters that are required to reach the server you want to manage. Looking at the file that we have here , The first block defined by all vars defines the variables required for the connection. “linux_clients” defines which group these variables belong to, here all means it belongs to all the groups. “vars” means that this is a variable block. The next block is “clients” which defines a set of hosts that are grouped. So, in order to act on this set of hosts I can use the name “clients” in the playbook. Here we have defined a name for each of the host IP’s that we have so that it is easier for us to recognize the system that might have some issues completing a task, or you can provide the hostname in each line instead.
[linux_clients:vars]
ansible_ssh_user=user_name
ansible_ssh_pass=user_password
ansible_ssh_private_key_file=complete_path_to_the_ssh_key
ansible_port=22

[linux_clients]
node1 ansible_host=x.x.x.x
node2 ansible_host=x.x.x.x
node3 ansible_host=x.x.x.x

[control]
ansible ansible_host=x.x.x.x
Playbook
Alright, let's look at the first playbook which is a simple playbook for installing/upgrading NetWorker client agent on RHEL.Playbooks as written in YAML,
---
- name: This playbook is for installating or upgrading Networker
  hosts: linux_clients
  become: yes


  tasks:
  - name: Copy the installation files
    copy:
      src: /home/user/linux/lgtoclnt-8.2.4.0-1.x86_64.rpm
      dest: /tmp/lgtoclnt-8.2.4.0-1.x86_64.rpm
      owner: student1
      group: student1
      force: no
      mode: '0777'

  - name: Install the NetWorker client binaries
    yum:
      name: /tmp/lgtoclnt-8.2.4.0-1.x86_64.rpm
      state: present
    notify: Start the NetWorker service


  handlers:
  - name: Start the NetWorker service
    service:
      name: networker
      enabled: yes
      state: restarted
    notify: update servers file

  - name: update servers file
    copy:
      content: "Backup_server"
      dest: /nsr/res/servers
    notify: Start the NetWorker service
...
- It starts with three hyphens and ends with three dots. This is just a general indication indicating the start and end of the yaml file.
- The second line is just an identifier, you can mention as to what this playbook does
- The 3rd line “hosts” defines the systems or group name defined in the inventory that we are going to alter the configuration of using this playbook
- The 4th line “become” is to ask ansible to run the tasks mentioned below as sudo
- The 5th line “tasks” is where the real fun begins. Below this line we define the work that will be done by using the different modules in ansible.
What is a module in Ansible?
Well, Ansible modules are reusable, standalone scripts that can be used by the Ansible API, or by the ansible or ansible-playbook programs. They are used to carry out the different operations on the target hosts that ansible supports. They return information to ansible by printing a JSON string to stdout before exiting. - “handlers” are tasks that can be initiated by other tasks only and only if they end successfully. So the 2 tasks that you see under that section are dependent on the other tasks in the playbook.
Let’s now look at the tasks one by one.
The name tag on each of these tasks is just a human readable message that will help us understand which tasks are currently running.
The first task in the list is to copy the installation file from the ansible core server to the hosts where the installation needs to be done. This task is using the “copy” module. You can refer to the documentation for this module to understand fields used within the task definition, these are the inputs to the modules.
The second task is to install the NetWorker client and this task is using the “yum” module, the state; present means that task is for installing the package. Absent would have meant we want yum to uninstall the mentioned package. We will look absent in the playbook where we will uninstall the NetWorker package. At the last line of the yum task we have a tag called notify which calls another task which is defined within the handlers on successful completion of the current task. In case the current task fails the handler task will not be notified to run.
If the “install the NetWorker client binaries” task fails then the playbook exits and no other task is run. But if it succeeds, “Start the NetWorker service” is the next. This uses the module “service” and you guessed it right it starts a service if not running or restarts the service if already running. And this task on success notifies the “Update servers file” task, which is using the “copy” module. This task copies the text defined in “content” into the destination files. If the file does not exist it will create the file and place the text inside the file. And these tasks will in turn notify the “Start the NetWorker service” task on successfully completing the copy task.
How to use the playbook?
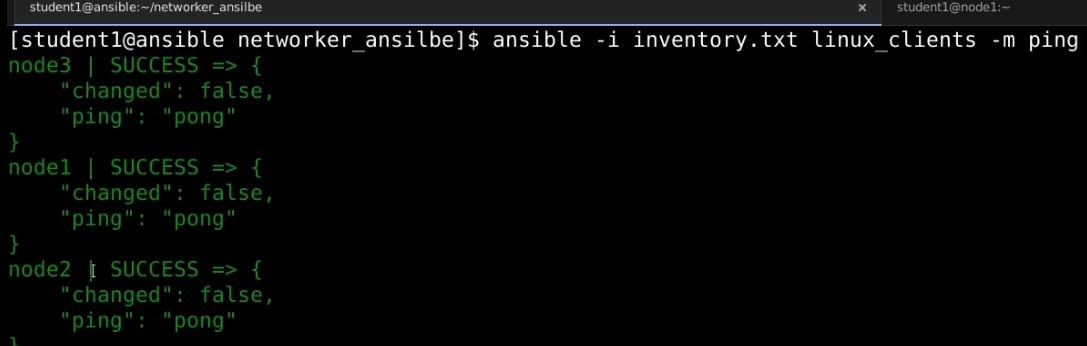
Before running the playbook it would be a good practice to check if the ansible core server is able to connect to the respective servers with the comunication protocol declared in the inventory file. This can be achieve using the ansible command, its takes in the target machine group or machine name and the module that is to be executed on the mentioned machines. Below is the command use to check ping, ping unlike on OS does not use ICMP but instead checks for ssh(Or the connection protocol mentioned in the inventory files) connection to the target hosts.
ansible -i <inventory_file> <host_group> -m ping
Here is how the output should look like.
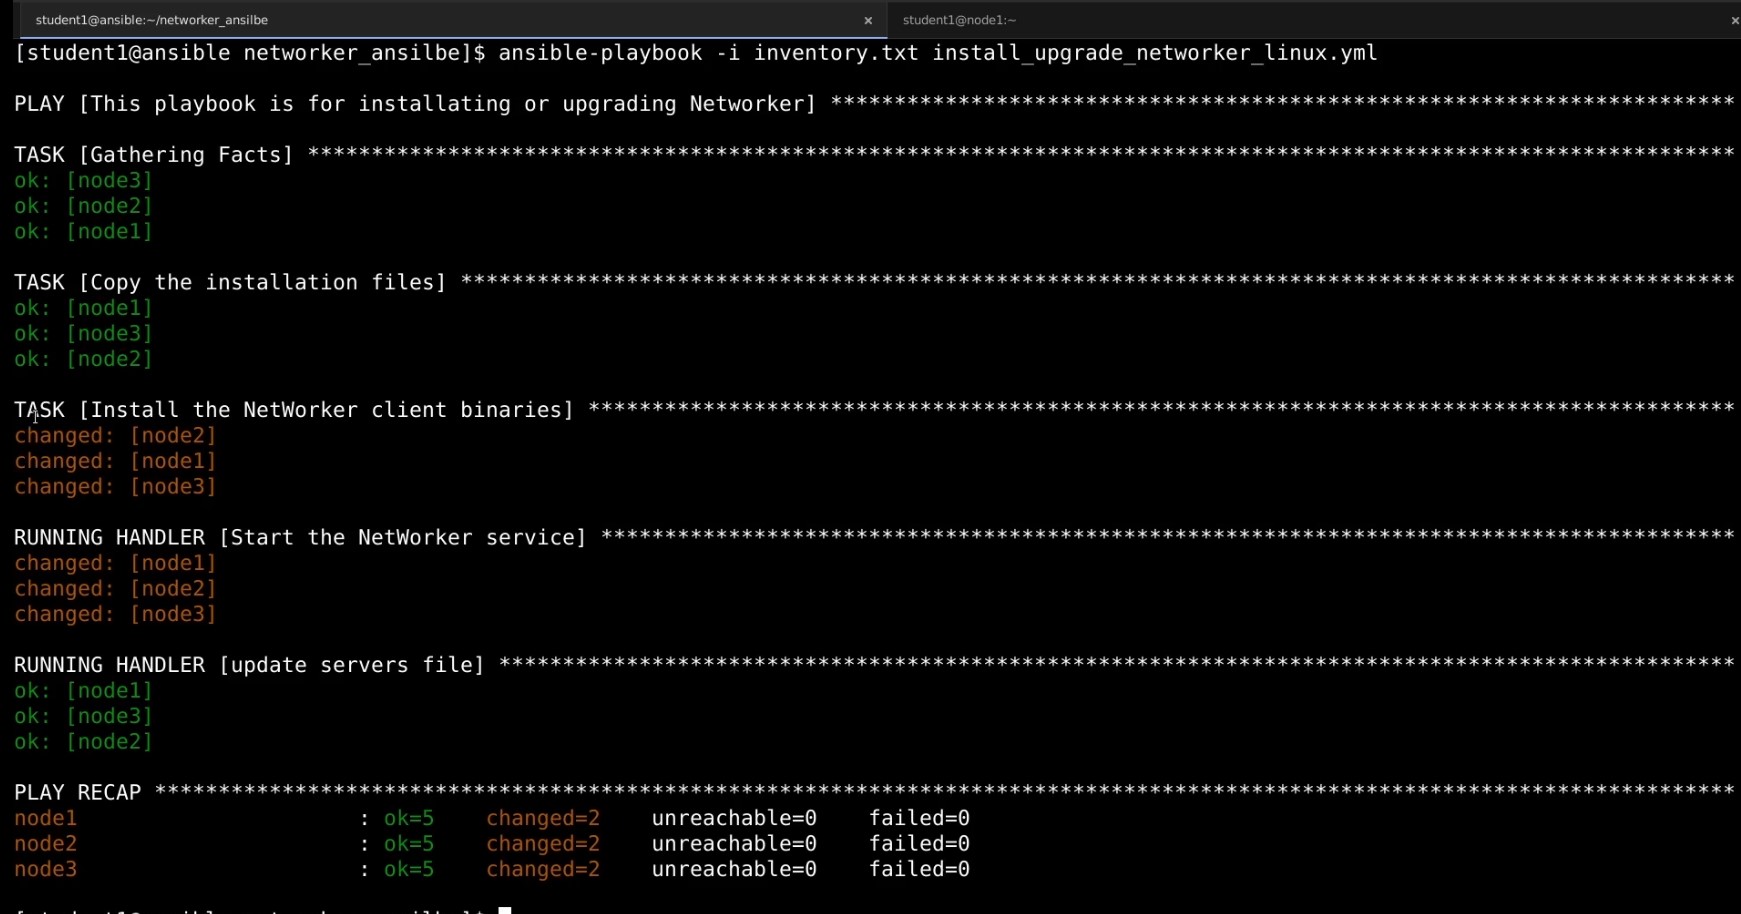
The playbook that you have created can be used with the ansible-playbook command. The complete command to use the play book with a custom inventory file is as follows
ansible-playbook -i <inventory_file> <playbook>.yml
Here is the output from the
Ansible for Windows hosts
Alright, this was for Linux and as you see the entire process of writing the playbook and running it is pretty simple and not at all scary, don't you think. Now let's take a look at how to achieve the same result on a windows machine. Unfortunately things are not that straight forward with Windows.
For Ansible to communicate to a Windows host and use Windows modules, the Windows host must meet these requirements:
- Ansible can generally manage Windows versions under current and extended support from Microsoft. Ansible can manage desktop OSs including Windows 7, 8.1, and 10, and server OS including Windows Server 2008, 2008 R2, 2012, 2012 R2, 2016, and 2019.
- Ansible requires PowerShell 3.0 or newer and at least .NET 4.0 to be installed on the Windows host.
- A WinRM listener should be created and activated.
- Also, on the ansible core server make sure you have installed the python library - pywinrm. if not use the command
pip install "pywinrm>=0.2.2"to instal this library.
For information on how to set set up the Windows host for Ansible refer https://docs.ansible.com/ansible/latest/user_guide/windows_setup.html
Inventory file for Windows target
Let’s first look at the part of the inventory file that defines the variables and host definition to be used for windows. We have a ansible_connection variable set to winrm which tells ansible to user winrm to communicate with the host.
Now Let’s look at a playbook for installing agents on NetWorker. The structure is almost the same, other than that we are not going to use “become: yes” and the user that you are using in the inventory should have administrator privileges on the target system.
[windows_clients]
node1 ansible_host=x.x.x.x

[windows_cleints:vars]
ansible_user=user_name
ansible_password=user_password
ansible_connection= winrm
ansible_winrm_transport= basic

[control]
ansible ansible_host=x.x.x.x
Playbook for Windows Target
              ---
- name: Install the NetWorker agent on Windows
  hosts: windows_clients
  become: yes

  tasks:
  - name: Copying the insallation files to the destination machines
    win_copy:
      src: /home/student/nw_win_files
      dest: C:\nw_files

  - name: Install the new root certificate
    win_certificate_store:
      path: C:\nw_files\NW9221-certificate.cer
      store_location: LocalMachine
      store_name: Root
      state: present


  - name: Installing the Client binaries
    win_package:
      path: C:\nw_files\lgtoclnt-9.1.1.7.exe
      product_id: NetWorker
      arguments:
      - /s
      - /q
      - /norestart
      - InstallLevel=100
      - NwFirewallConfig=0
      state: present
    notify: updating the servers file

  handlers:

  - name: updating the servers file
    win_copy:
      content: backup_server
      dest: C:\Program Files\EMC NetWorker\nsr\res\servers
    notify: Restart the service

  - name: Restart the service
    win_service:
      name: nsrexecd
      state: restarted
...
Like how we had in the earlier playbook first we will be copying the installation files over to the target server. Let’s take a look at what we have in the file set to copy over. We have a client installation files and the certificate file. I wanted to add a task for installing the certificate because of the issues upgrading to the latest version of Networker due to the missing certificate. The next task is to install the root certificate to the Trusted publishers on local machine. Then we install the networker client which on completing successfully notifies the task for updating the server’s files. This is optional of course. This task inturn notifies the task called win_service which is set to start the NetWorker services.
Using loops in the playbook.
Now let's look at a little more complicated playbook for upgrading and installing the NetWorker 18.2 client, the Extended client and man pages. Gotta have them all you know. These are listed as an array under the with_items and take a task run multiple times for each of the items in the array replacing it in the place of {{ item }}.
Here is the playbook that I have created for installating 3 packages, all under one task definition.
                    ---
- name: This playbook is for installating or upgrading Networker
  hosts: clients
  become: yes


  tasks:
  - name: Copy the installation files
    copy:
      src: /home/student1/18_linux_x86_64
      dest: /tmp
      owner: student1
      group: student1
      force: no
      mode: '0777'

  - name: Install the NetWorker client binaries
    yum:
      name: /tmp/18_linux_x86_64/{{ item }}
      state: present
    with_items:
      - lgtoclnt-18.2.0.3-1.x86_64.rpm
      - lgtoxtdclnt-18.2.0.3-1.x86_64.rpm
      - lgtoman-18.2.0.3-1.x86_64.rpm
    notify: Start the NetWorker service


  handlers:
  - name: Start the NetWorker service
    service:
      name: networker
      enabled: yes
      state: restarted
    notify: update servers file

  - name: update servers file
    copy:
      content: "Backup_server"
      dest: /nsr/res/servers
    notify: Start the NetWorker service
...
Uninstall a package
Last but not the least here is a playbook that can be used to uninstall a package from a Linux based system using the yum package. The state parameter is set to absent to instruct Ansible to uninstall the package mentioned in the name parameter.
---
- name: Remove NetWorker Application from this server
  hosts: clients
  become: yes
  tasks:
  - name: Running Yum to remove the Application
    yum:
      name: lgtoclnt-18.2.0.3-1.x86_64
      state: absent
...
Thank you for visting www.crazyrov.com, you can also check out my YouTube channel - crazyRov Studios for Data protection and cloud related technical videos.


