Integrating NetWorker Authc with AD/LDAP
Integrating your authc with AD gives you the flexibility of using the same authentication authority which means no more maintaining a password repository or a worksheet with all the passwords needed to support your infrastructure. For those who don't know much about Authc, Authc is short for NetWorker Authentication service which is a web-based application that runs within an Apache Tomcat instance on the backup server. The Authc provides a NetWorker environment with token-based authentication and Single Sign on support. This enables users to securely connect to the NMC server, NetWorker server to perform various operations. The NMC and NetWorker servers do not authenticate the user against the LDAP authority. The NMC server requests user validation from the NetWorker Authentication Service. The NetWorker Authentication Service performs a look-up to determine the LDAP or AD group that the authenticated user belongs to in the external authority. When authentication succeeds, the NetWorker Authentication Service issues a token to the NMC server. Activities that you perform in the Console window and the NetWorker Administration window uses the token information to ensure that the user can perform only the activities that the user has the appropriate privileges to perform. This as said before makes it easier and much cleaner to perform user management on NetWorker.
Requirements Summary
Domain Controller
A domain controller on the network that the NetWorker server has access to is required. NetWorker authentication service will be integrated to the AD services on this domain controller to provide authentication for the users that are configured on the respective active directory. The authorization would still be controlled on the NetWorker Management Console server and the NetWorker server. The port 389 required to be open between the NetWorker server and the Domain controller.
User account for integration
A user account on the AD that can be used to configure the integration of NetWorker Authentication service with the Active directory services is required. This user account should have full read access on the AD directory.
Security Group
Ensure that a new Security group is created for you team so that the access to NetWorker can be done using this security group. It is recommended to have a separate group for each group of administrators depending on the level of access on the NetWorker. Regular housekeeping of the group is important to ensure that the correct set of users have the correct level of access on the respective NetWorker environment.
Information from the Active Directory
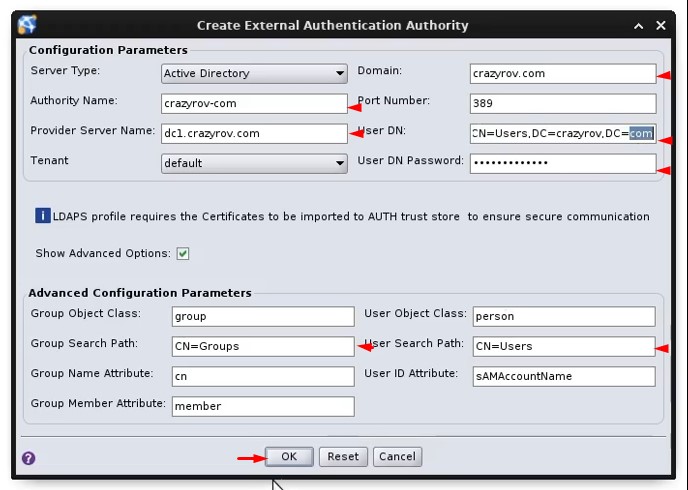
In order to complete the configuration for integrating the AUTH service with AD service we require the information that is highlighted in the image below. The Show Advanced Options option has to be selected in order to see all the parameters. The sections below the image describe the process of getting this information. This section will also provide you with the information on where to get these details from and you can get all this from you AD administrator.
Note: Distinguished name or DN is a sequence of relative distinguished names (RDN) connected by commas. An RDN is an attribute with an associated value in the form attribute=value; normally expressed in a UTF-8 string format. The following table lists typical RDN attribute types. The most common RDN are as follows:
String Attribute Type DC domainComponent CN commonName OU organizationalUnitName
Authority Name
A descriptive name, without spaces for the LDAP or AD configuration. The maximum number of characters is 256. Specify ASCII characters in the config name only. This parameter servers as an identifier and you can provide any name that best describes this configuration.
Provider Server name
A string that specifies the protocol, hostname, or IP address of the LDAP or AD server.
Domain
A descriptive name, without spaces for the domain attribute in the local database. It is recommended that you specify the domain name that is used by the LDAP or AD authority. The maximum number of characters is 256. Specify ASCII characters in the domain name only.
Bind User DN
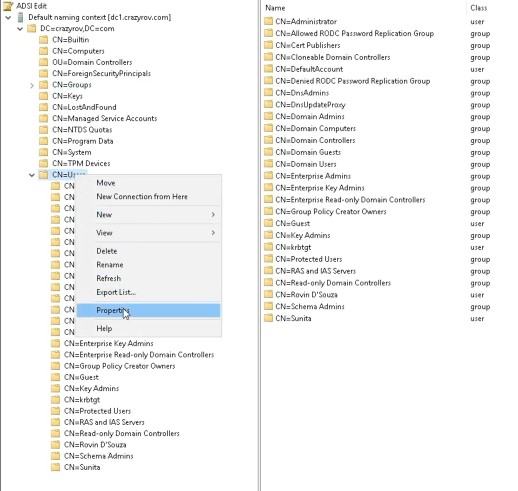
The full distinguished name (DN) of a user account that has full read access to the LDAP or AD directory. Use ADSI Edit tool to get the DN. On the ADSI Edit locate the user that you are going to use to bind the services with, right click and select properties. On the properties window, locate the attribute .distinguishedName, click on the attribute and then click on View.
User DN Password
The password of the bind account (described above).
Group Search path
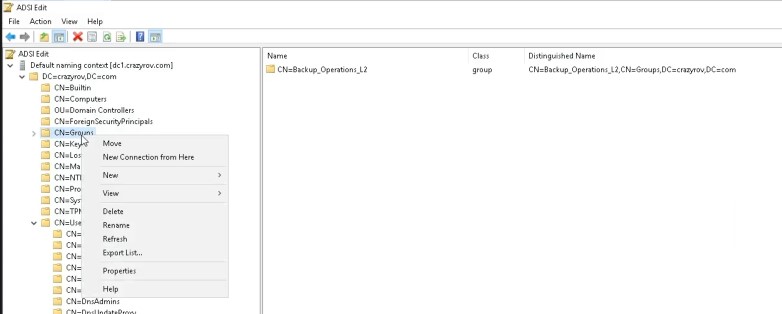
The DN that specifies the search path that the authentication service should use when searching for users in the LDAP or AD hierarchy. Specify a search path that is relative to the base DN that you specified in the config server- address option. For example, for AD, specify cn=users. To get this information again go on the ADSI Edit tool, locate the security group that you want to use to manage the team’s access with, then right click on the parent folder of that object and select properties. On the properties window, locate the attribute ,distinguishedName, click on the attribute and then click on View.
User Search path
A DN that specifies the search path that the authentication service should use when searching for groups in the LDAP or AD hierarchy. Specify a search path that is relative to the base DN that you specified in the config server- address option. To get this information again go on the ADSI Edit tool, locate the bind user that you are using for this configuration, then right click on the parent folder of that object and select properties. On the properties window, locate the attribute distinguishedName, click on the attribute and then click on View.

Configuring the Authorization with External Authority
Creating a External authority binding
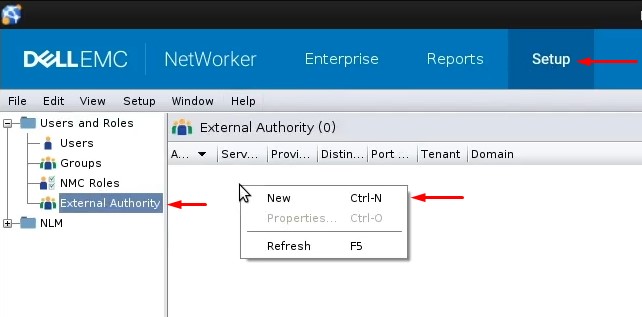
To start configuring the binding login into the NMC as with the administrator user. The navigate to Setup and then on the left menu under Users and Roles select External Authority. Right click on the right-hand pane and select New from the menu on your screen.
You will get the Create External Authentication Authority window, on this window first enable Show Advanced Options. For the Server Type attribute select active Directory from the drop-down menu. A few of the values in the window will be filled in automatically with default values, leave these values as default and fill in the rest of the edit text fields with the information that you for as described under section 3 – Information from the Active Directory. Click OK when done.
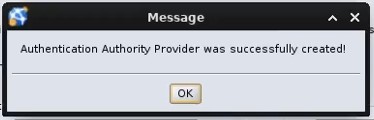
If all the parameters that are provided are correct, then you will get the below pop-up dialogue starting that the process was successful.
Adding user from AD into authc database through the NMC
Now that the external authority is configured, the next step is to add the users to NetWorker. Keep in mind that the users that you create on the NMC is actually created on the authc database of the NetWorker server which is integrated with the NMC. To create a new user, login into the NMC as an administrator, go to the Setup tab. On the left menu go to Users under the Users and Roles section. On the right-hand pane and select New.

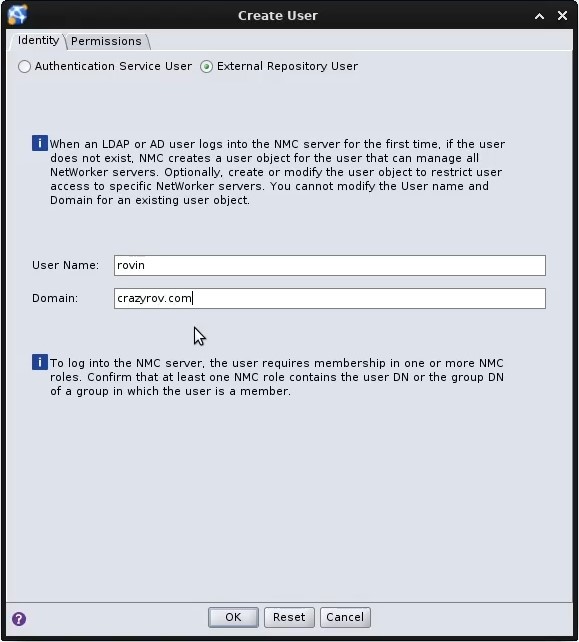
The Create User windows pop-up. On the window select the option External Repository User which is for adding users from an external repository which in our case is an AD. As show in the screenshot below type in the user name for the user that you want to add to NetWorker for the user Name attribute and the relevant domain against the Domain attribute, then click on OK.
Add authorization on the NMC and NetWorker
The authorization for a user using the to access the NetWorker Administration console is at 2 levels. First in the NMC configuration and the second in NetWorker.
Adding authorization on the NMC
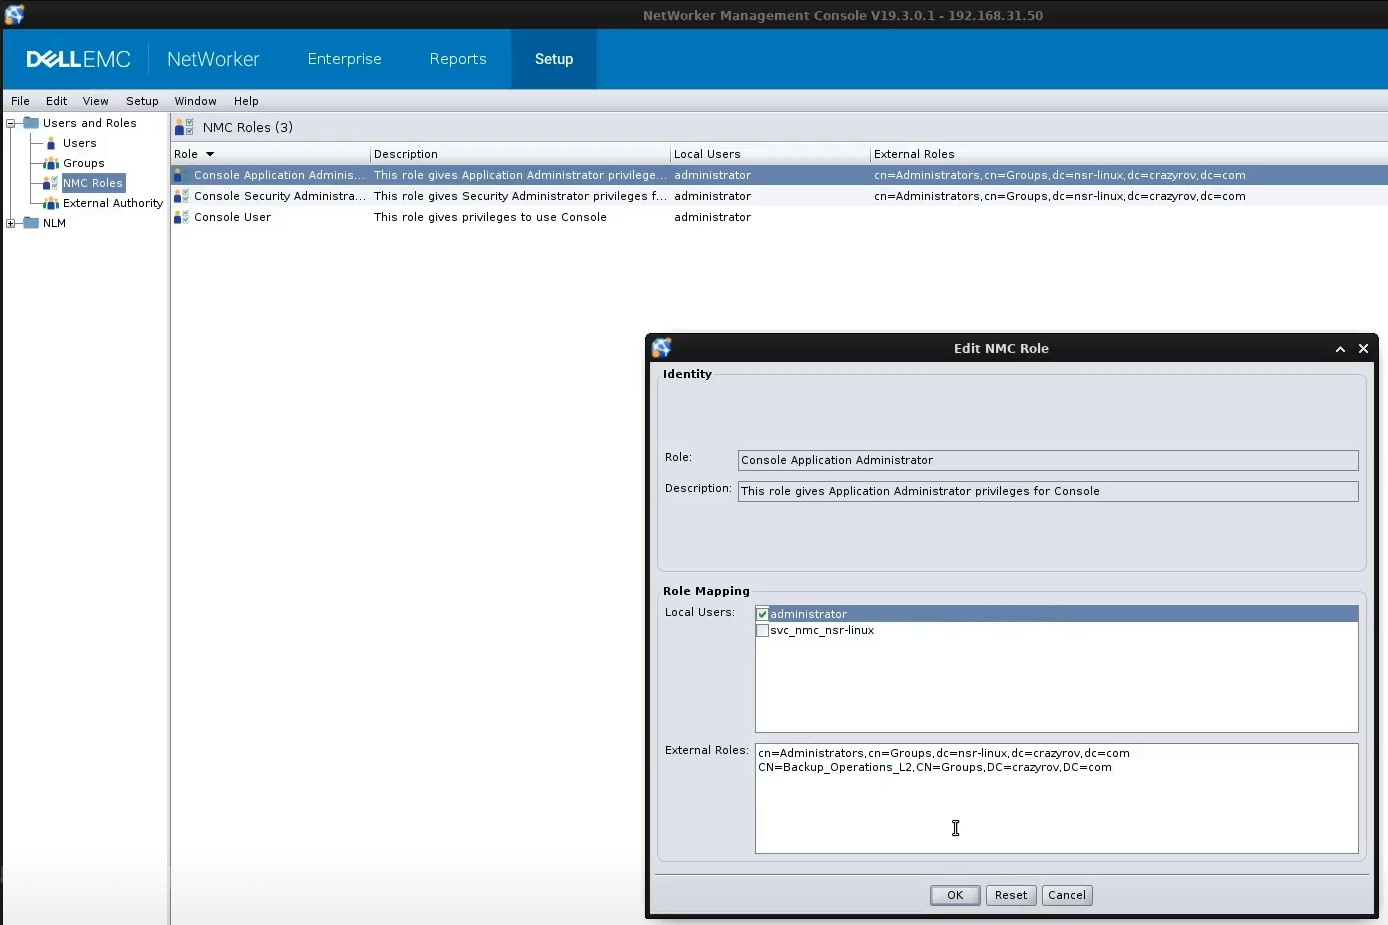
To authorize the user on the NMC, login into the NMC with administrator credentials. Navigate to the Set up and this time click on NMC Roles in the left menu under Users and Groups. Add the user to the respective role here depending on the role assigned to him. In the below screenshot the user is being added to the Console Application Administrator role. The entry for the user should be done under the section Role Mapping under the attribute External Roles, the entry should be in a Distinguished name (DN) format. It is best practice to add the security group here so that this can set up once and any onboarding and offboarding can be managed by using the security group on the AD.

Adding Authorization in NetWorker
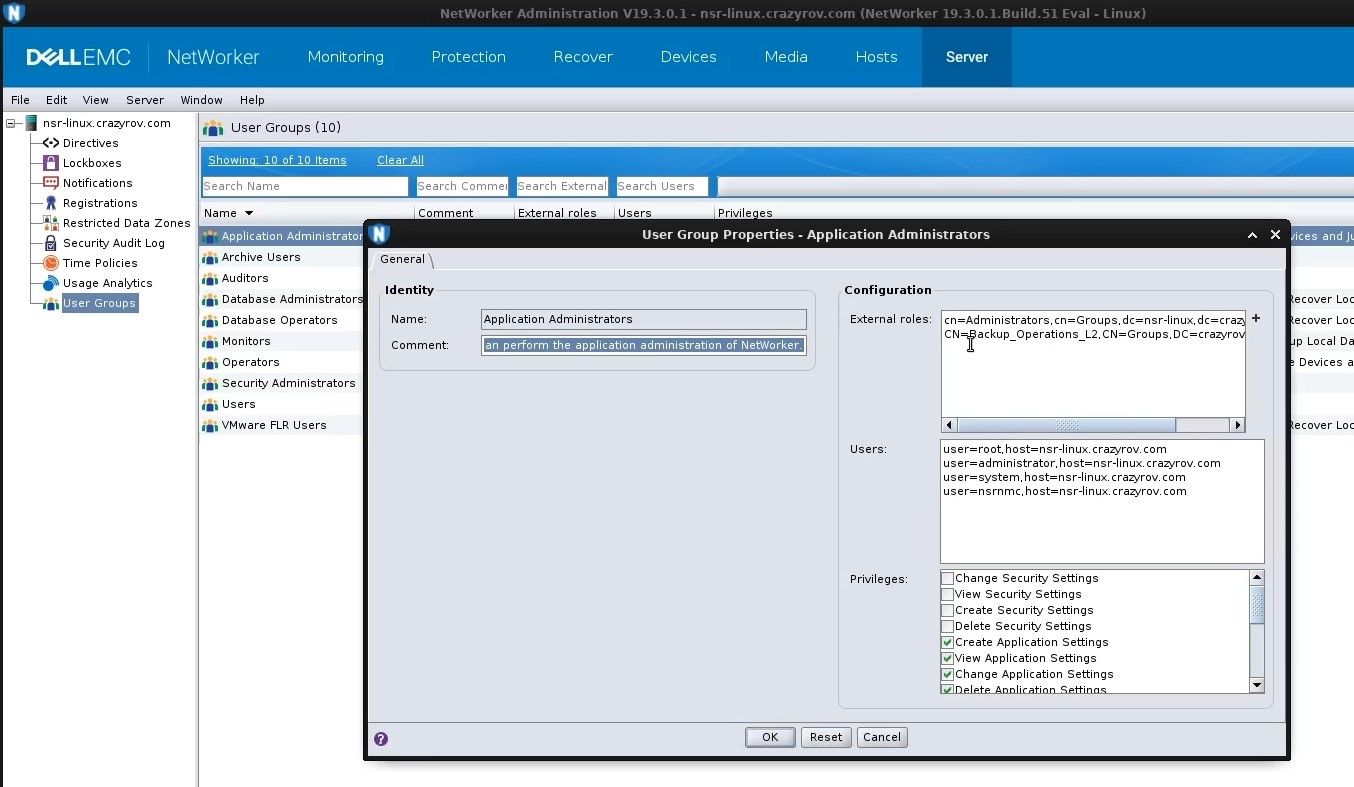
To authorize the user on the NMC, login into the NMC with administrator credentials and then launch the respective NetWorker Administration console. The new user that we have added to the NMC needs to have additional permission on the NetWorker server in order to manage the NetWorker server resources. By default, all users have monitor networker, recover local data and backup local data. To assign any other permissions the respective user or the security group that the user is part of is added to the respective User group in NetWorker. For this on the NetWorker Administration console go to the tab Server on the left menu list click on User Groups. Add the user or the security group DN to the user group that satisfies the access requirement for this user. In the screen shot below the security group is being added to the Application administrators
Redundancy
Even though the integration of AUTH with the AD services gives a centralized user management, since only one Domain controller reference can be provided in the External authority configuration it is also a single point of failure. When an external authority is configured most of the members in the operation will depend on their AD domain user ID’s to login to manage NetWorker. Any downtime with the respective Domain Controller server will cause disruption to the operational tasks. Thus, it is recommended to have more than one External authority configuration with all the Domain Controller servers that are available in the network.
Thank you for visting www.crazyrov.com, you can also check out my YouTube channel - crazyRov Studios for Data protection and cloud related technical videos.


